Safely Jetting your two stroke dirt bike.

Jetting and intake information
Post Reply
User avatar
Sandblaster
Posts: 6313
Joined: Thu Jun 07, 2012 3:50 pm
Location: Eugene, OR
Contact:

Safely Jetting your two stroke dirt bike.

Post by Sandblaster » Sat Aug 11, 2012 12:30 am

Introduction to Safely Jetting your two stroke dirt bike.
Sounds easy right?
If it were easy, everyone would have perfectly jetted bikes.
Yet, most of the bikes I hear and see are running rich or lean (More rich then lean).
In fact, one of the easiest and cheapest ways to make more power is to jet your bike taking into account all the variables.
That's right, jetting = power.
If your bike has not been jetted correctly you will almost certainly gain power somewhere and likely everywhere in your RPM range.
In this discussion I will attempt to give you what you need to safely jet your bike.
Let me be clear up front, I have been riding and playing on bikes for many years but I do not consider myself a master mechanic.
Therefore I have enlisted the help of a few people that I do consider Master mechanics.
I'm certain that we can give you enough good information that you will find the discussion informative and highly accurate.
So, before I get into this in depth, do you know someone with a dyno?
Do they Jet bikes for a reasonable fee?
If so, why not take it to them, drop it off, pay the money, and be happy?
First off, you don't want your bike tuned for absolute peak power because you would be running lean and frag your engine.
Let's say that he will tune your engine just a little rich off of peak HP, what then?
If you took it to your buddy and his dyno is at sea level and he jetted your bike, then you take it up a few thousand feet in elevation and ride it, your loosing power. Why? Because the air has more density at lower elevations then in higher elevations.
So, your bike will be blubbery and sluggish the higher you go because it will be running rich.
I have specific jets for different places I ride.
This is a good spot to discuss what things can effect your jetting and why.
If I'm at sea level I have one set of jets.
If I'm in the high desert I run another.
Why? Again the air has more density at lower elevations then in higher elevations.
It stands to reason that anything you modify, replace, or change in your fuel system, intake system, combustion chamber, exhaust valves, porting, exhaust system, fuel quality, type of oil, type or style of air cleaner, oil to gas ratio, condition of crank seals, and condition of your top end in general, will change your jetting needs.
Did I mention the weather is a factor?
That's right, hot days will require leaner jetting and cold weather requires richer jetting.
Why is that?
Think about it this way.
The more air you let into the combustion chamber, the more fuel you need or your bike will run lean.
Conversely, the less air you allow into the combustion chamber, the less fuel you will need or it will run rich.
So what does this have to do with the weather?
What happens when you heat the air up?
The molecules move faster and further apart.
See the chart below.
Note how few Air molecules there are.
Because they are hotter, they vibrate faster and push the surrounding air molecules farther away giving you less air in the combustion chamber:
Image
What happens when you cool the air down?
The molecules move slower and move closer together.
They do this because they are colder, they vibrate slower and can't push the surrounding air molecules farther away:
Image
Note that on both charts there is the same amount of fuel entering the combustion chamber regardless of air temperature.
So it's winter out and it's 10 degrees, the air is going to be extremely dense (Molecules are closer together).
This means that your engine will be allowing more air molecules into the combustion chamber, thus requiring more fuel.
Let's say that it's in the middle of the summer, your in the desert, and it's 110 degrees.
The air will be a lot less dense (Molecules are further apart).
That means that you will be letting in a lot less air into the combustion chamber requiring a lot less less fuel.
Humidity also has an effect on jetting.
Remember, anything that lets less air into the combustion chamber makes it run richer.
If it's humid the water molecules in the air are taking the place of air molecules.
Image
So, less air, you need less fuel.
Suppose your riding at the coast and a huge storm hits as you are 20 miles from camp.
There will be even more water molecules in the air, taking up more valuable space in your combustion chamber for those air molecules.
If your bike was already jetted extremely rich when you started the day, you might end up fouling a plug before you make it back to camp :oops:
Ever wonder why there are few jetting charts out there?
The few that you will find including the K5 chart on my site are very conservative and are only meant for a starting point.
http://www.oem-cycle.com/KX500JETTINGGUIDE.shtml
The reason why charts are conservative is because if you run your bike rich you may not get all the power it can produce and you might fowl some plugs but, you will not burn it up.
Run your engine too lean and it will be down on power and you risk melting your piston to your cylinder wall or welding your connecting rod to your crank :o
Before we get into the technical part of this discussion we are going to assume that your engine, fuel system, and exhaust system, is in good over all condition.
If your bike has mechanical issues, jetting your carb won't fix the underlying problem and is really a waste of time.
Fix your problems first, make your engine mods, put on that shiny new dent free pipe, repack your muffler, decide what fuel, oil, and ratio your going to use, mod your air box, make sure that your carburetor floats are correctly set, and that your carburetor is super clean inside and out, then look at your jetting.
Remember, if you get your carb perfectly jetted and then change anything in the system, you get to start jetting all over again!
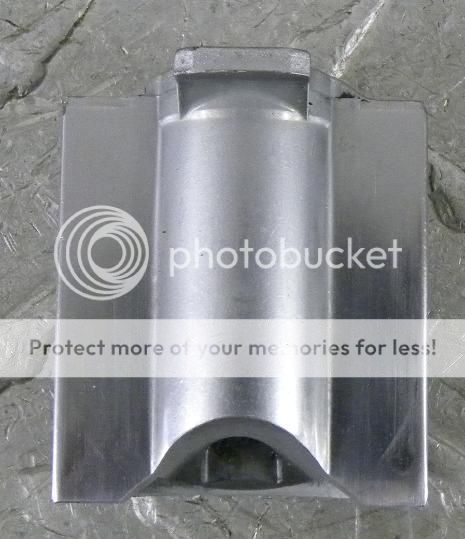
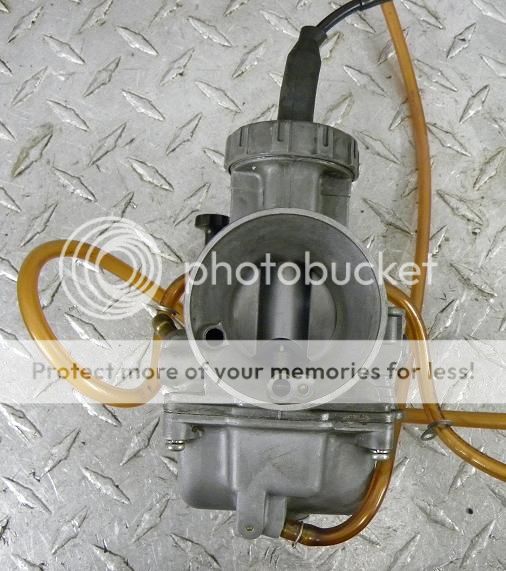
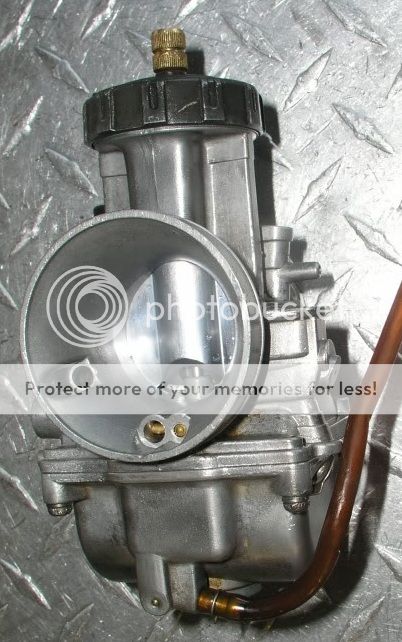
Since I ride a K5, I will post pics of a Keihin carburetor off a 2000 KX 500.

Image

One last thing before I begin, I recommend that you make one change at a time.
Otherwise all you will do is go round in circles in trying to figure out where your jetting should be.
Now for the technical side.
If bikes are for kids I'll never grow up.

User avatar
Sandblaster
Posts: 6313
Joined: Thu Jun 07, 2012 3:50 pm
Location: Eugene, OR
Contact:

Re: Safely Jetting your two stroke dirt bike.

Post by Sandblaster » Tue Aug 14, 2012 1:05 am

Adjusting your Air screw
Enough of the theory, lets get into the meat of the article.
Here is a pic of the carb with labels for ID's.

Image

Note: the air screw is usually located toward the air box side of the carb (Big end).
Why start with the Air screw?
The Air Screw is a fine adjustment tool that works along with your pilot jet for starting, idling and the initial phase of your power delivery.
However, as touched on earlier the pilot circuit affects the complete throttle range.
What, how could that be?
Think about it this way, when you are running at full throttle the main jet is delivering most of the fuel, yet, the pilot is also still delivering fuel.
Sure, it's not delivering as much fuel as the main jet but it still is contributing to the overall total fuel being dumped into the system.
Checking your idle screw first will give you a good indication if your pilot jet is too lean or too rich.
Since the pilot jet effects your entire fuel delivery system from idle to wide open it is important to start here.
Otherwise you will be chasing your tail round and round.
Adjusting the Air screw is simple and straightforward.
What I like to do is verify that my float height is set at the correct level.
If the float height is not set correctly your jetting will be off the entire range from idle to wide open.
As a side note the 90-04 KX500 float height should be set at 15-17mm or .590-.670".
I will cover how to check and adjust your float height in another article.
Once the float height settings are verified I clean my air filter, install a new stock spark plug, put in fresh gas, start the bike up, and ride it until it is fully warmed up.
Adjusting the air screw before it is completely warmed up is pointless as you will not know how it will run until after you warm it up fully.
Also, this procedure must be done at the elevation that you plan on riding it at and preferably under the same temperature and humidity conditions that you will operate at on average.
With the engine fully warmed up and running, turn the air screw all the way in (Clockwise). Don't over tighten it. Turn it so that it just bottoms out as that is good enough.
You may have to hold the throttle on a bit to keep it running or adjust the idle so that it is a few hundred RPM's higher then normal.
Once you bottom the air screw out, turn it back out (Counter clockwise) approximately 1/4 of a turn and then wait about 20-30 seconds so that the engine has time to catch up to that setting.
Keep turning the air screw (Counter clockwise) approximately 1/4 of a turn and then wait 20-30 seconds for the engine catch up, do this until the engine reaches it's fastest idle position.
Do not keep adjusting the air screw out past the point where the engine idles the fastest.
If you do your engine will probably run with a lag or be very mushy.
Now that the air screw is adjusted so that the engine is running it's fastest, shut the engine off and turn the air screw clockwise, counting the turns until the air screw bottoms out again.
The ideal air screw position is 1.5 turns.
If the air screw only turns say 1 turn or less then your pilot jet is too small and is running lean at idle.
Installing a new pilot jet is easy.
Simply remove the bowl, unscrew the pilot jet, read the numbers on the side of it and get the correct jet.
Now, install the next size larger pilot jet and start from the beginning, adjusting the air screw.
If the air screw turns 2 or more turns then your pilot jet it too big and the engine is running rich at idle.
Install the next size smaller pilot jet and start from the beginning, adjusting the air screw.
Here is a pic of the carburetor opened up:

Image

The pilot jet is down deep in that hole and requires a flat blade screw driver to remove it.
Here is a pic of the pilot jet removed from the carburetor:

Image

See those little holes in the pilot jet?
Those are called Emulsion holes.
The Emulsion holes must be clean and free of debris.
You should also be able to look down the center of the jet and see daylight through it with no obstructions.
If adjusting the air screw has no effect then most likely there is a plugged up portion of your idle circuit.
Remember what I said earlier? "Your carburetor must be clean inside and out"
That includes all the little passageways so disassembly will be required.
Eventually you should end up with a air screw setting that allows the engine to idle correctly and is between 1 and 2 turns from the bottomed out position.
There again we are shooting for 1.5 turns.

Main jet

Image
If you race, ride hill climbs, or spend a lot of time from 3/4 to full throttle, the main jet gains in importance.
Contrary to popular belief, your main jet only effects 3/4 throttle and up.
Thinking that changing your main jet will fix a lower throttle position setting is wrong.
The main jet plays no part from idle up to 3/4 throttle.
So, how can you tell if your main jet is wrong?
When you hit 3/4 to full throttle, does your bike start pinging?
If so then you need to go richer.
Does your bike feel sluggish on top, perhaps it won't rev up as high as it should?
That's a good sign that you are too rich.
What I like to do is install progressively richer main jets until the bike starts to bog on top and then back it off one size or until it gains performance again.
Once again, I would rather be a little fat on top then lean.
If bikes are for kids I'll never grow up.

User avatar
Sandblaster
Posts: 6313
Joined: Thu Jun 07, 2012 3:50 pm
Location: Eugene, OR
Contact:

Re: Safely Jetting your two stroke dirt bike.

Post by Sandblaster » Sun Aug 19, 2012 1:50 am

Slide, What is it and what does it do?

Image

In most cases you will not have to change your slide unless it is just worn out.
The main job of the slide is to meter how much air flows into the engine.
When at idle, the slide is in the down position.
This blocks off most of the air into the engine but not all.

Image

When you twist the throttle to the wide open position the slide moves up to it's top position.

Image

While the slides main job is to control the air flow into the engine it also meters air at low RPM's by means of angles cut in the bottom of the slide.
This area is called the Slide Cut Away.

Image

Stamped into the slide is a set of numbers.
The lower the number the richer you will be at low RPM's.
The higher the number the leaner you will be at low RPM's.

Image

Most of the time it will be unnecessary to change the slide unless you are making radical engine modifications or if the manufacture just flat out blew it in their slide selection :-)

Here is Sudco's slide chart
Slide info.jpg
Slide info.jpg (246.97 KiB) Viewed 14029 times
If bikes are for kids I'll never grow up.

User avatar
Sandblaster
Posts: 6313
Joined: Thu Jun 07, 2012 3:50 pm
Location: Eugene, OR
Contact:

Re: Safely Jetting your two stroke dirt bike.

Post by Sandblaster » Mon Aug 20, 2012 9:53 pm

Needle, What is it and what does it do?

Image

There are three parts to most needles.
You have the Length which effects the largest part of your midrange but also has a tendency to effect a little upper and lower throttle positions as well.
There is the taper which typically effects 3/4 throttle to full throttle but is the least sensitive part of the needle.
And last there is the needle diameter which controls mainly the 1/4 throttle range or just off the pilot jet.
Needle Length
As you can see from the picture below the needle has several positions for the clip.
Starting with position 1, if the clip is in this first position this will allow the least amount of fuel through thereby giving you the leanest condition.
So the further down the needle you move the clip the richer your mixture will be.

Image

If your needle length is too lean you will loose a lot of your midrange power.
In fact it may feel like riding a small bore two stroke, simply no power down low, then as it finally revs up, whoah baby!
The biggest problem with running the needle length too lean is welding your piston to your cylinder or, burning a hole in your piston.
Running the needle length to rich will make it run weak and blubber in the midrange.
So, what is the safest way to figure out your needle length?
Put the clip in the 1st or 2nd position and run the bike.
Then move the clip one position richer and run the bike.
Keep doing this same procedure until the bike starts to run weak and blubbery, then back the clip one position.
It's important that you not run the bike too lean in the midrange as typically most riders spend the majority of their time in the midrange.
Needle Taper
If you look at the picture of the needle you will see that the lower half is tapered.
The taper has the least effect on your jetting.
The taper effects the areas from 1/2 to full throttle but primarily around the 3/4 throttle range.
Something else to consider, if you run a leaner taper you will need a richer main jet, and if you run a richer taper then you will need a leaner main jet.
My feelings are to leave the taper alone unless you are making critical engine mods, the engine designer blew it, or your running in extremely cold conditions.

Needle Diameter

Most of the time the needle diameter effects the 1/4 throttle position or just as you start to feel the engine pulling.
It can however effect a little on either side of 1/4 throttle.
IF the needle is set to lean you will loose bottom end power and once again you will most likely shorten the life of your engine and in some cases dramatically.
If the needle is set to rich your engine will bog out and in more extreme cases you will fowl your spark plug.
On a few bikes there are good reasons to change the needle but for most, unless you have a real good reason for changing the needle, I say to leave it alone.

I'll be adding some additional information from time to time so check back once in a while and feel free to chime in.
Thanks!
SB
If bikes are for kids I'll never grow up.

User avatar
Sandblaster
Posts: 6313
Joined: Thu Jun 07, 2012 3:50 pm
Location: Eugene, OR
Contact:

Re: Safely Jetting your two stroke dirt bike.

Post by Sandblaster » Thu Dec 06, 2012 4:43 am

Similar topics or questions:
jetting a 2 stroke dirt bike
jetting a 2 stroke dirt bike carb
Jetting your 2 stroke
2 Stroke Jetting questions
2 stroke jetting info
Why Does My Dirt Bike Keep Fouling Spark Plugs?
how to tell if lean or rich for 2 & 4 stroke
Cold weather jetting Questions
Pre-mix ratio effects on jetting
Carb Jetting Basics
Altitude jetting guide
jetting issues
If bikes are for kids I'll never grow up.

gitbrit
Posts: 3
Joined: Thu Oct 08, 2015 2:21 am

Re: Safely Jetting your two stroke dirt bike.

Post by gitbrit » Mon Nov 16, 2015 5:30 am

I have a question.....I'm new to jetting, but learning. I am working on my pilot jet/air screw setting and have come up with an issue I need help with. (By the way...it's a '92 KX500) Started out with a 60 Pilot jet, went through the process described above and it was apparent I need to try a smaller pilot jet. I put in a 58. Now, the bike has a marginally high idle, but the throttle stop screw appears to have zero effect on it either way. I can unscrew it 12 or 15 turns and idle stays the same, and I can screw it all the way in to the stop and the idle stays the same. Before I continue with pilot jet experimenting, I feel I need to learn what may be causing my throttle stop screw to have no effect on idle. Any idea's would be greatly appreciated, thank you!

Andy
1982 Maico 490 Alpha-1
1992 KX500
1994 CR500
2002 KTM 520 MXC
2007 KX250F
2012 Ducati 1199 Panigale
2015 KX450F
2015 KX450F Supermoto

User avatar
Sandblaster
Posts: 6313
Joined: Thu Jun 07, 2012 3:50 pm
Location: Eugene, OR
Contact:

Re: Safely Jetting your two stroke dirt bike.

Post by Sandblaster » Mon Nov 16, 2015 4:06 pm

Hi Andy.
It's possible you have other issues.
But before we go any further we need to know what the main jet is, the needle type and the clip setting, your basic riding altitude, and the numbers off the side of your carb.
If bikes are for kids I'll never grow up.

User avatar
60something
Posts: 61
Joined: Sat Mar 03, 2018 6:45 pm
Location: Midwest USA

Re: Safely Jetting your two stroke dirt bike.

Post by 60something » Tue May 08, 2018 10:57 pm

Wow! This is a great tutorial. I will definitely be using this information when I ever get my K5 project done. Thanks Sandblaster!! :D

P.S. Took your advice and checked Ebay constantly for '87 power valve components and finally got my hands on what I needed.
I don't know half of you half as well as I should like, and I like less than half of you half as well as you deserve.

2006 Kawasaki KDX200 qty-2
1987 Kawasaki KX500
1991 Honda CB750 Nighthawk
1973 Kawasaki H2 750 Triple - gone but not forgotten

User avatar
Sandblaster
Posts: 6313
Joined: Thu Jun 07, 2012 3:50 pm
Location: Eugene, OR
Contact:

Re: Safely Jetting your two stroke dirt bike.

Post by Sandblaster » Tue May 08, 2018 11:10 pm

60something wrote:
Tue May 08, 2018 10:57 pm
Wow! This is a great tutorial. I will definitely be using this information when I ever get my K5 project done. Thanks Sandblaster!! :D

P.S. Took your advice and checked Ebay constantly for '87 power valve components and finally got my hands on what I needed.
Excellent!
If bikes are for kids I'll never grow up.

Post Reply

Return to “Carburetion, Induction, Fuel injection, Intake”

Who is online

Users browsing this forum: No registered users and 2 guests